
Best TradingView Indicators: What Makes Them the Best?
TradingView clearly indicates that there is no universal indicator for all cases and all traders. It's a convenient starting point: instead of looking for one line that supposedly knows the direction, you need to pick the properties of the market that are important to your scenario.
The best TradingView indicators can be compared using five criteria:
- The question the tool answers.
- What data is it based on?
- How quickly it responds to a price change.
- In which market regime does it most often produce useful observations?
- What condition invalidates its conclusion?
For example, moving average smooths past prices and helps read direction. ATR measures range and does not indicate direction. Together, their output is more useful than two moving averages with similar periods because the tools describe different properties.
Which roles should an indicator set cover on the chart?
The matrix below does not rank tools from first to last. It shows why each one is needed and where mistakes are particularly easy to make.
| Role | Tools | What they provide | Key limitation |
|---|---|---|---|
| Trend | SMA, EMA, MACD | direction, smoothing, and the relationship between moving averages | respond to past data |
| momentum | RSI, Stochastic, MACD | speed and state of price movement | the edge of the scale does not imply a reversal |
| Volatility | Bollinger Bands, ATR | range expansion and the normal scale of noise | do not predict direction |
| Activity | Volume, VWAP | market participation and volume-weighted average price | depend on the market and session |
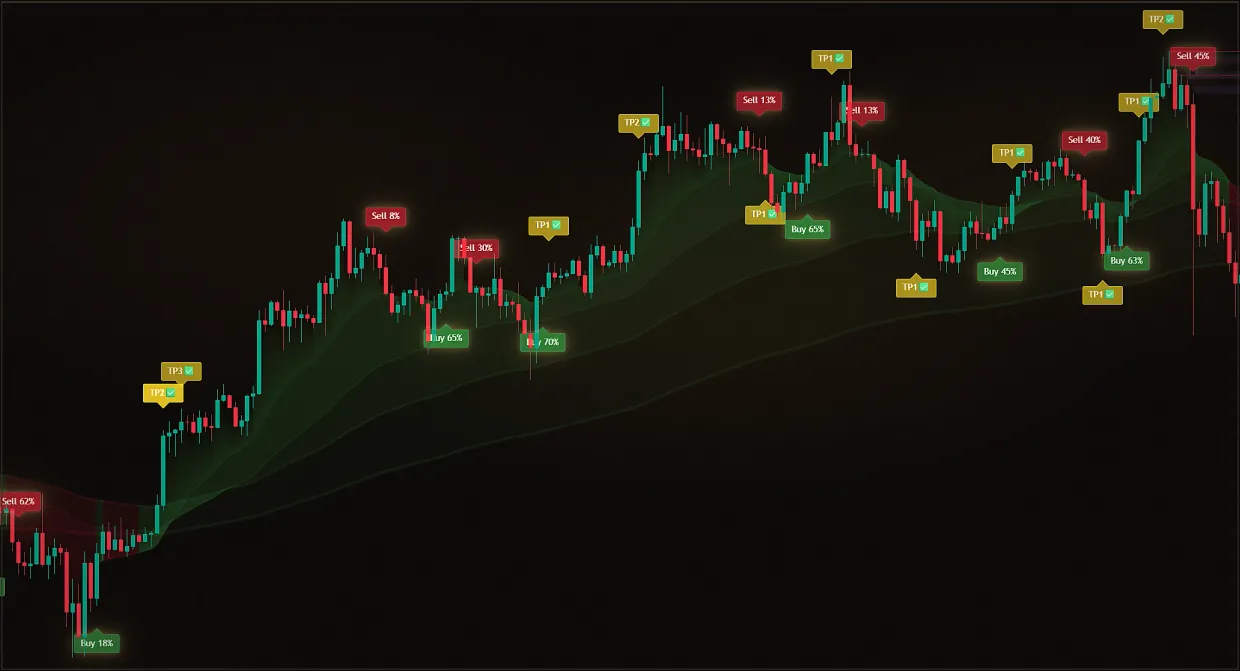
| Signal and context | Midas Up, Midas Down | compact cues within the Midas system | require confirmation from price action and a risk rule |
Price, candles, support, and resistance sit outside the table because they form the foundation for reading a chart. An indicator adds a measurement method but does not replace structure. An overview of all categories is available in the article about indicators for trading.
Which should you choose for trend: a moving average or MACD?
TradingView's documentation describes a moving average as a reactive indicator: it averages past data and confirms a move that has already formed. EMA gives more weight to recent values, so it usually responds faster than SMA. A faster response also means greater sensitivity to noise.
MACD is built from the difference between two EMAs, a signal line, and a histogram. It helps show how the distance between the averages is changing and whether momentum is accelerating. Crossovers can occur frequently during a sideways move, so MACD should not be read separately from the range and levels.
For a simple directional filter, a single EMA usually makes it easier to define a clear rule. If you need to compare trend and changes in momentum, MACD provides more information. The best TradingView indicators in a trend block should simplify the decision rather than duplicate it across three lines.
Which should you use to assess momentum: RSI or Stochastic?
RSI moves on a scale from 0 to 100. In a strong trend, it can remain in an extreme zone for a long time, so selling solely because the reading is above 70 often means trading against the move. It is more useful when combined with price structure, a level, and a change in momentum.
Stochastic compares the close with the high and low of the selected period. It reacts faster within a range and helps identify a return from an extreme zone. In a trending market, this sensitivity produces more early signals.
Keep one oscillator and define its role in advance. If RSI and Stochastic are used only to mark the same overbought condition, the second pane adds no independent argument. The best TradingView momentum indicators become useful alongside price, not instead of it.
How should you assess volatility: with Bollinger Bands or ATR?
Bollinger Bands consist of an average and boundaries based on standard deviation. Narrowing shows that dispersion is decreasing; widening shows that it is increasing. Touching an outer line does not prove a reversal: price can travel along the band in a strong trend.
ATR converts volatility into a single value based on true range. It does not label the move as upward or downward. Its role is to compare current noise with the distance to the invalidation condition and the intended target.
Choose TradingView volatility indicators based on the type of information you need. Bands are more convenient for seeing range geometry on the chart; ATR provides a clearer comparable numeric scale for a series of observations. They can be used together when each serves a separate role and does not become duplicate confirmation of direction.
What do Volume and VWAP show?
The volume indicator requires relative comparison. A single bar says little without a history of readings for the same instrument at the same point in the session. Rising activity during a breakout strengthens the case for the scenario but does not reveal which side will ultimately hold the level.
VWAP is particularly useful for intraday trading. TradingView's official reference describes it as a volume-weighted average price and notes the lag inherent in averages. Price above or below the line provides context, not a ready-made entry.
If the market does not provide representative volume or different venues show different data, the conclusion must be limited accordingly. The best TradingView indicators cannot fix the quality of the source data feed. First determine which data reaches the chart, then assign it a role.
How do you choose a tool for each market regime?
| Market regime | Foundation | Additional layer | What Not to Do |
|---|---|---|---|
| Trend | price, structure, EMA, or MACD | ATR for the scale | selling solely because RSI is at an extreme |
| The range | support and resistance | RSI or Stochastic, Bollinger Bands | entering in the middle of the range without an edge |
| Breakout | level and candle close | Volume, ATR | treating the first wick-through as confirmation |
| Intraday | session structure | VWAP, Volume | transferring a conclusion between incomparable sessions |
| Momentum reversal | level and price reaction | RSI, MACD, divergence | entering a trade before price confirmation |
This table provides a starting selection that must then be tested on a consistent sample. Some rules may stop working when the market regime changes. Record not only the outcome but also the conditions: trend, range, volatility expansion, and session time.
If the best TradingView indicators were selected from one favorable historical segment, they are almost inevitably overfit. Define the rules first, then apply them to a consecutive history containing different market regimes.
When do multiple lines start getting in the way?
Three moving averages with different periods, MACD, and a trend rating can all report direction because they rely on price and smoothing. RSI and Stochastic can also show an extreme state at the same time. The agreement looks convincing even though the calculations partly reuse the same data.
Run an audit:
- Write down one question next to each indicator that it answers.
- Remove the tools with the same question.
- Keep price and levels as the primary context.
- Identify a condition under which the output of each indicator is ignored.
- See if the decision becomes clearer after the line is removed.
TradingView's Technical Ratings summary also combines moving averages and oscillators. It is useful for a quick overview, but a Buy or Sell category remains derived from a set of rules and historical data. The best TradingView indicators should make the decision rationale transparent, so use the summary as an attention filter rather than a standalone trading signal.
How do you put together three compact sets?
Set for a trending market:
- EMA for direction and the pullback area.
- ATR for assessing the normal range.
- Volume to confirm participation during continuation.
Set for a range-bound market:
- Horizontal boundaries based on confirmed reactions.
- RSI or Stochastic to read momentum at the edge.
- Bollinger Bands for changes in range width.
Set for the intraday breakout:
- A level and a candle close beyond it.
- Session VWAP for intraday location.
- Volume for activity and ATR for the scale of noise.
Midas Up and Midas Down can be tested as a separate signal-and-context layer in any set. Remove one external tool with a similar role while testing them. The best TradingView indicators do not have to appear on screen simultaneously to be useful.
How do you test a set without overfitting?
Testing procedure:
- Select one asset, timeframe and a market regime.
- Describe the role of each indicator and the exact condition to observe.
- Record the price confirmation condition and invalidation condition.
- Take at least 20 consecutive events without selective omissions.
- Record the signal, context, action, risk, and outcome using the same template.
- Only after completing the series should you change one parameter and repeat the comparison.
Compare the entire process, including the share of successful crossovers. Assess lag, conflicts, clarity of invalidation, and how often the set drives a decision without price confirmation. A good set removes unnecessary actions and preserves repeatable reasons.
Paper Trading in TradingView is suitable for safe mechanical testing. The discrepancy between historical and actual execution remains, but the rules can be worked out without placing real capital.
How does Midas fit into the selection matrix?
Midas Up helps identify continuation context, while Midas Down highlights moments that require checking for a possible reversal. Only these two indicators are available in the 7-day demo. That is enough to compare their cues with a familiar setup without changing the entire process.
For a clean test, leave Midas and one independent filter on the chart, such as volume or ATR. Compare signals on closed candles and do not cherry-pick successful episodes. If the external indicator serves the same role, remove it for the duration of the series.
This turns the best TradingView indicators from a list of names into a clear system of roles. Evaluate Midas like any other tool: with consistent rules, a consecutive sample, clear invalidation, and no promise of results.
Risks and limitations
Indicators do not account for every cause of price movement. News, liquidity gaps, data delays, slippage, and execution costs can change the outcome. Historical results do not determine future execution. A setting that works on one asset may perform poorly on another.
Define acceptable risk, position size, and exit conditions before the trade. If indicators conflict with price or with one another, skipping the scenario remains a valid decision. This material is educational and is not personalized investment advice.
Sources
- TradingView: getting started with indicators - distinct roles and no universal tool
- Moving Averages, TradingView - smoothing, trend, and lag
- MACD, TradingView - calculating and reading momentum
- Relative Strength Index, TradingView - scale, period and extreme zones
- Bollinger Bands, TradingView - moving average, standard deviation, and band width
- Average True Range, TradingView - true range and volatility
- Volume, TradingView - trading activity
- Volume Weighted Average Price, TradingView - volume-weighted average and anchor period
- Technical Ratings, TradingView - summary ratings from moving averages and oscillators
Frequently asked questions
Is there one best indicator in TradingView?
No. TradingView's official documentation explicitly warns that no universal indicator suits every task and trader. Moving averages, RSI, ATR, and Volume measure different market properties. Choose the question first, then the tool and testing rule. A universal ranking without the context of the asset, timeframe, and market regime creates false precision.
How many indicators should you keep on the chart?
Two or three indicators with distinct roles are usually enough alongside price and levels. One may describe direction, another momentum or volatility, and a third activity or a signal. If two lines answer the same question, remove one. Simplicity makes conflicts and invalidation conditions easier to identify.
Which indicators are suitable for a beginner?
A moving average for direction, ATR for the scale of the move, and Volume for activity are the easiest place to start. Read each tool separately instead of trying to obtain a ready-made command. After a series of observations, you can add RSI or another oscillator. Studying a large set all at once makes it difficult to understand which conclusion actually helped.
Which is better for trend: EMA or MACD?
EMA clearly shows smoothed direction and price relative to the line. MACD compares two exponential moving averages and adds information about changes in momentum. A simple directional filter is easier to define with EMA; MACD provides more information when you need to compare trend with changes in momentum. Use both only when their roles are separated in advance.
Can you enter on an RSI or Bollinger Bands signal?
An extreme RSI reading or a touch of the outer Bollinger Band is not an entry on its own. In a strong trend, RSI can remain extreme while price moves along the band. Require a price level, a closed-candle reaction, and an invalidation condition. The oscillator or band only adds context.
How can you test Midas for free?
The bot offers a 7-day demo that includes only Midas Up and Midas Down. Record the asset, timeframe, and rules before the series begins, then compare the cues with price action and one independent filter. The demo shows how the tools work but does not promise a trading outcome.