

What a Trading Strategy Is and How It Differs from a Signal
An indicator marker, a level breakout, or a candle closing above the average price may provide a signal to evaluate. Without context, it does not tell you which instrument and timeframe it applies to, what invalidates the scenario, or how to manage the open position.
A trading plan is not a substitute for a strategy either. It helps apply rules that have already been tested to a particular session. This requires a separate trader's trading plan.
Which Rules Make Up a Testable Strategy
CME Group includes entry and exit conditions, position management, a stop-loss, a target, and acceptable risk among the basic elements. You should also add the market, instrument, timeframe, session time, and invalidation condition. This separates an actionable specification from a description such as “enter with the trend.”
- 1
Scope
Market, instrument, and timeframe
- 2
Setup
The context in which we look for an entry
- 3
Trigger
One observable event
- 4
Risk and exit
Stop-loss, target, and scenario invalidation
- 5
Testing
All signals, costs, and holdout data
How to Define the Setup and Entry Point Without Ambiguity
A setup described as an “upward trend near a level” remains vague. First define which method classifies the trend as upward, how the level is constructed, and how close the price must be for the setup to be considered active.
Then add the trigger. For example: “after a candle closes above the level boundary, provided the trend remains upward.” Observing only a closed candle reduces the risk of looking ahead within the bar. A separate review of the entry-point indicator shows how to check a marker against the context.
How to Define the Exit, Stop-Loss, and Risk in Advance
Before testing, write down four things: stop-loss placement, the position-sizing method, the target, and the early-exit condition. For example, market structure may invalidate the scenario before the target is reached. Every such event must be identifiable on the chart, not based on mood.
A recorded stop-loss defines the trigger point, but not the execution price. FINRA explains that once the stop price is reached, a stop order becomes a market order, so during a fast move it may be executed at a price significantly worse than the stop price. Another risk is that a brief price spike triggers the stop-loss before the market returns to its previous level. A test should therefore model the stop-loss with an allowance for execution rather than using the ideal level price.
There is no universal risk percentage, identical stop-loss distance, or mandatory reward-to-risk ratio. The risk calculation procedure is explained in the guide to risk per trade.
How to Account for Commissions, Spread, and Slippage
Include the commission in the test according to the fee schedule of the specific venue. Because the spread changes, define a baseline scenario and a more conservative one, and include a realistic slippage allowance for market orders with inconsistent execution.
Use the venue's published fee document rather than relying on memory. The Moscow Exchange publishes its equity-market fees, which show why a single number is insufficient: under the asymmetric model, the taker pays a total of 0.03 percent of the trade value, while the maker pays zero during the trading period. For a strategy that enters using market orders, this difference alone changes the test result. The broker's commission is added to the exchange commission, so both must be included in the cost model.
Investor.gov's explanation of order execution notes that the execution price does not have to match the quote the trader saw when submitting the order. A historical candle does not show the full path of real execution: the TradingView strategy documentation explicitly states that the tester executes orders after the bar closes and makes assumptions about price movement within it.
How to Backtest a Strategy Without Overfitting
For the first version, take one set of rules and run it through the data without selectively changing parameters after every failure. Any revision made after viewing the report creates a new version that requires a new run.
Compare the result with a simple baseline to see whether a complex filter adds information over the same period, but this comparison does not prove future profitability. Campbell Harvey and Yan Liu's paper “Backtesting”, published in CME Group's education section, separately examines the risks of multiple testing and selecting the best variant in hindsight.
The cost of trying multiple variants can be measured. An article in the Notices of the American Mathematical Society shows that if only ten strategy configurations are tested, the best one is expected to produce a historical Sharpe ratio of about 1.57 even though every variant produces zero on new data. The authors call this backtest overfitting and add that the more variants are tested, the longer the historical period must be for the result to be credible. The number of versions tried should therefore be recorded alongside the result rather than forgotten after the run.
Step 1
Split the data
Development and holdout testing
Step 2
Build the rules
Changes are allowed only on the training period
Step 3
Freeze the version
Parameters and costs are recorded
Step 4
Open the holdout period
One test without further tuning
Step 5
Compare and decide
Accept, revise, or stop the test
Risks and Limitations
- Any strategy can produce a series of losses and lead to a loss of capital.
- Hypothetical results do not reproduce liquidity, emotions, or every aspect of real execution: the NFA explicitly lists insufficient liquidity and slippage among the limitations.
- Past results, even when supported by a robust holdout test, do not guarantee future returns.
- An indicator or signal is not a substitute for a risk decision.
Disclaimer. This material is for educational purposes and does not constitute personalized investment advice. The market is volatile, and trading involves the risk of losing capital. Past results do not guarantee future results.
Why You Need a Holdout Sample and a Trade Journal
For time series, the training and holdout periods are split chronologically. Randomly shuffling candles can transfer future information into the training portion. In a monograph by Joseph Simonian, the CFA Institute Research Foundation discusses chronological splitting as a fundamental measure for validating investment models.
The journal should include the date and time, instrument, timeframe, setup, trigger, planned and actual entry and exit prices, reason for exit, and costs. Add MFE (Maximum Favorable Excursion) and MAE (Maximum Adverse Excursion): the position's maximum unrealized profit and maximum unrealized loss during the trade. These are two extremes, not the complete price path, and they do not by themselves prove the quality of a strategy. A template of session fields is available in the trading plan.
Example: From an Idea on the Chart to a Testable Rule
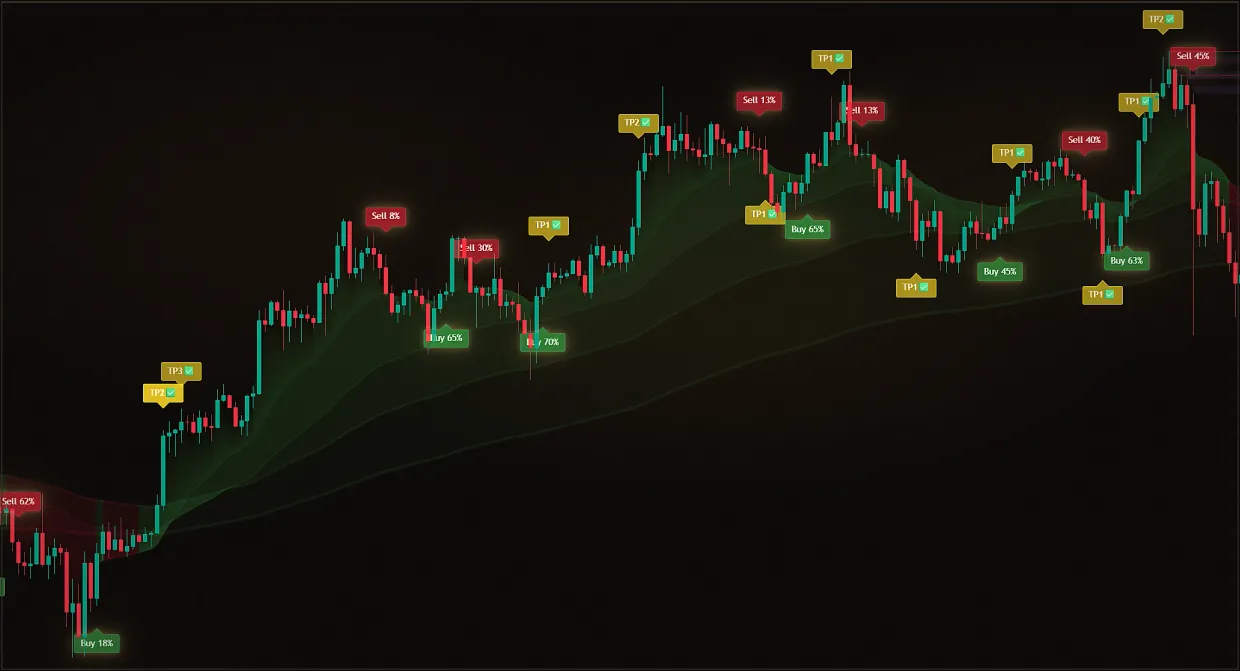
Consider the Midas Up scenario for one instrument and timeframe: the setup is active when the trend is upward and the price is near a predefined level; the trigger is a Midas Up Buy marker on a closed candle while both conditions remain satisfied. The stop-loss is placed beyond the point where the scenario ceases to be valid, and the exit occurs at the target, the stop-loss, or a predefined invalidation condition.
If the setup is active, every consecutive marker is included in the test, including losing, false, and missed cases; they must not be removed from the journal. The result is calculated after costs and compared with a baseline selected in advance, after which the rule is tested without changes on the holdout period.
Idea in words: take a signal with the trend
Rule: the event is visible on a closed candle
- 1.Specify the instrument and timeframe
- 2.Define the setup and entry trigger
- 3.Record the exit, stop-loss, and costs
When to Change the Strategy and When to Stop the Test
Define the stopping criteria in advance. They may include a discrepancy between the training and holdout samples, instability across market regimes, or unacceptable sensitivity to costs. There is no universal number of trades or test duration after which a strategy can be considered proven.
Suitable if
- The rules define observable events in advance
- Historical data cover different market regimes
- Commissions, spread, and slippage can be estimated
Not suitable if
- The setup was defined after viewing the result
- Some trades are excluded without a rule written in advance
- The holdout period has already been used for tuning
Any change to the entry logic, exit logic, market, timeframe, or cost model can materially alter the result, so the version must go through the full process again after a revision. It must not be adjusted using the same holdout period: those data have already become part of the development process.
Sources
- CME Group: Step 4. Trading Strategies in Your Trade Plan
- Campbell R. Harvey, Yan Liu: Backtesting (Journal of Portfolio Management, 2015, in CME Group's education section)
- Bailey, Borwein, Lopez de Prado, Zhu: Pseudo-Mathematics and Financial Charlatanism (Notices of the AMS, 2014)
- TradingView: Strategies
- Commodity Futures Trading Commission (CFTC): Back to School: Learn to Trade Futures and Options Without Getting Scammed
- FINRA: Stop Orders: Factors to Consider During Volatile Markets
- National Futures Association (NFA): Interpretive Notice 9025 to Compliance Rule 2-29
- Moscow Exchange: Equity Market Fees
- Investor.gov: Executing an Order
- CFA Institute Research Foundation: Investment Model Validation
Frequently Asked Questions
What is a trading signal?
A signal is a marked event, such as an indicator marker or a level breakout. It can serve as a trigger within a trading strategy, but it does not define the market context, risk size, stop-loss, or exit. A signal must therefore be evaluated within the complete set of rules before entry.
What is a setup, and how does it differ from a trigger?
A setup describes a suitable market situation: the trend direction, zone, volatility, and other filters. A trigger specifies one exact event for entry. While the setup is inactive, the same signal is ignored. This distinction is not a universal terminology standard, but it helps make a trading strategy unambiguous.
Which conditions should be defined for entry and exit?
An entry requires three layers: scope, setup, and an exact trigger. For the exit, define a protective stop-loss, a target, and a condition for invalidating the scenario early. Every event must be based on observable data. The specification is ready when another person can reproduce the same decision from the same chart.
Why might a good backtest not be replicated on new data?
The market regime changes, and an identified pattern may turn out to be a random coincidence. Fitting amplifies this risk: out of many variants, the one that best describes the known past is selected. A holdout sample reduces the risk of self-deception but does not eliminate uncertainty about the future.
How can you avoid contaminating the holdout sample?
Before viewing the holdout data for the first time, freeze all conditions, parameters, and costs. After the test, do not tune the rules using the same period. If the version needs to be changed, those data become training data, and a new holdout period will be needed for an independent test.
How many trades are needed to test a strategy?
There is no universal number. Whether a sample is sufficient depends on the setup frequency, the variety of market regimes, and the stability of the result. Do not choose a threshold simply because it is a convenient round number. First check whether the data cover different market phases and whether there are enough signals to assess the dispersion, not just the average result.




Comments
Source comments are not translated and are never replaced with Russian text.